Completing additional tasks in Mass Effect: Andromeda. Mass Effect: Andromeda walkthrough Walkthrough mass effect andromeda names of the missing
Prologue: "Hyperion"
Begin Mass Effect: Andromeda walkthrough from watching a spectacular introductory video, after which, waking up after 600 years of sleep, we communicate with Dr. Lexi T "Perrot and an AI named SAM (instead of EDI from). After a collision with an unknown object, we inspect the room, talking with the people in it, if desired, we check how things are going with sister or brother, depending on who you started playing for. You can also use the information wall, after which, opening the door together with Cora, we go to the Hyperion bridge. In the next room, before going further, you need to find out the cause of the failure, we do this using a scanner turning it on by pressing the G button and scanning the power circuit by pressing RMB. After detecting a problem, switch the power relay on the marked console, and then go to the monorail collecting data blocks along the way. Arriving at the bridge, we talk with the captain and Raider Sr. As a result, finding ourselves in the locker room, we inspect the room collecting data blocks, we talk to people and look for our helmet lying nearby. After we find the helmet, we take the weapon and go to the hangar, where after a short conversation we go to the planet.
While viewing video walkthrough of the game Mass Effect: Andromeda To switch between videos, use the "Playlist" tab...
On a surface
After a not very successful landing, we set off to look for the remaining members of the squad. Having discovered the wreckage of the ship and aliens next to them, we try to make contact or immediately start shooting, one way or another we will still have to open fire. After shooting a couple of aliens, we talk to another survivor named Fisher. Next, having examined the area, we collect supplies scattered nearby and then set off to look for other team members. We destroy all the enemies along the way, and also carry out tasks “at will”, such as “Find Greer”, “Inspect the crashed ship”, Find the source of the signal flares”, “Inspect the cave”. Also along the way we will come across unknown ruins that are so It’s worth inspecting, inside the ruins you will need to get into a locked room and turn on the generator there, after which we inspect the complex and enter into battle with an unknown robot. As a result, having completed all the tasks, we go in search of the second shuttle, and after we find it, we protect the team from attacking aliens. At the end of the battle, collecting ammunition and additional weapon. Having fought off another attack of aliens, we set off to look for the Pathfinder, and having met him, we follow Rider Sr., attacking enemy positions. Having penetrated the complex, we take up defensive positions by placing our partners at the indicated points and shoot the attacking aliens while the Pathfinder is engaged in decryption. At the end of the decryption process, we help the senior Ryder open the gate and watch the next video.
Reunion with Nexus
Using the monorail we will get on board the Nexus, there we are looking for employees by scanning the surroundings, you can also talk to the AI Avina. As a result, having found the builder, we talk with him and with the approaching Tiren Kandros, after which we go to the Nexus command center. Upon arrival, we communicate with Director Tann at the Pioneer headquarters, after which you will need to talk separately with Tann, Cash, Kendros and Addison, generally only conversations and nothing more.
Sabotage at the station
At the request of technician Raj Patil, we are using a scanner to check the marked Nexus systems in search of intentional damage to the system. At two panels you will find wires leading to other relays. Having reached the other relays along the wires, we also scan them and then go along the monorail to another compartment to talk with the “saboteur” Zara Kellus. After the conversation, we find out that someone else is organizing the sabotage. To find out the identity of the saboteur, we go to the command center to check the records of the security systems. Only the third record will not be badly damaged; after it is restored, we scan the Nexus security staff in the control center and on the Hyperion. Having discovered a certain Dale Atkins, we expose him.
First killer
To investigate the murder, first of all we talk with the prison guards in the command center, and then with the accused. Next, you should talk to Kandros and, if you wish, listen to the recording again on the console nearby, after which we talk with a witness named Shaw. The last conversation at the station will be with Director Tann, after which we need to go to Eos and inspect the crime scene. Having arrived at the place and started scanning, we inspect the armor elements, eventually ending up in a nest of karkins. Having destroyed all the monsters, we will find another piece of armor by scanning it and studying it, thus gaining access to data that will prove Nilken’s innocence. We will also be able to listen to the audio recording, after which we will need to talk with Nielken.
From scratch
Having received for use our personal ship called the “Storm”, which is a little reminiscent of the “Normandy”, we set off to surf the expanses of the Andromeda galaxy. Our first task will be on the planet Eos, ultimately we need to clear the atmosphere of radiation, but first we will examine the main structure of “Object 1”. The door to the building will be closed, so we go to look for the access code to the locked buildings, it will be on one of the data blocks in the marked room. Having opened the locked door, we inspect the power control station and then go to another locked building, where we talk on the radio with Clancy Arkvist. Next, we go to start the generators by turning on the first one, scanning the marked power tower and then climbing to its top, where we turn on the generator again. As a result, having turned on both energy towers, we shoot the attacking kett, after which we return to Clancy, talk with whom we approach the console and restore the power.
After the power is restored, we can inspect the previously locked premises, we will also need to find transport, for this we scan the containers scattered around the territory. Having found the required container, we request the advanced station from orbit, after which we can open the container and get the all-terrain vehicle. Using our new vehicle, we set off to check a strange signal coming from an alien device. Having arrived at the place, we try to connect to the device, and after an unsuccessful attempt, we climb onto one of the columns to scan the glyph. Then, returning to the console, we activate the alien device, after which we get acquainted with Peebee and repel the attack of the collectors. Next, we will need to turn on two more alien monoliths, having first scanned two more glyphs on each (on the columns, having scanned them, you can see the wire leading to the glyph).

When you turn on alien devices, you will also have to fight off enemies, and on one of the monoliths, to turn it on, you will need to decipher the Relics code by arranging the glyphs so that there are no identical ones in each of the four cells (as in the screenshot). After turning on the monoliths, we go to the place where the rays converge, there we will meet Peebee again and, together with us, we go down into the dungeon. Having opened the door and jumping down, we begin to examine the Relic storage, finding another console and activating it, we follow the outline located in the walls and floor. As a result, having stumbled upon another “well with variable gravity,” we continue our descent into the depths of the complex. As a result, having stumbled upon a leaking circuit, we repair it by first scanning the leak, after which we continue to move along the circuit. To get through the caves, we raise parts of the floor using relic consoles. Having reached the indicated console, we activate it and then run in the indicated direction to get out of the storage facility. Next, we go to the indicated place to establish an outpost, there we kill all the kett and, after talking with Drak again, we invite him to our team, after which we fly to the Nexus to talk with Tann at the pioneer headquarters.
Secret project
Having discovered the “Fortitude” object in the desert, we inspect it and find a console in one of the rooms, after turning it on, our squad will be attacked by the kett. Having killed all the kett, as well as a monster named Demon, we are looking for the secret project of Object 2, having discovered the next console, turn it on, after which we will need to find two of the three parts. One of the parts will lie on the floor in the same room, the second in the desert near the broken shuttle. As a result, having found all the details, we return to Object 2 and scan the scientific project, completing the task and obtaining scientific data of the Milky Way.
Ray of hope
Continuing the passage of the main plot, we go to the Onaon system, where we will meet with the Kett ship. After a short conversation and subsequent successful escape through the “corruption,” we land on the planet Aya, where we meet aliens of the Angara race. After talking with the local governor named Paaran Shie, we follow her to the Angarsk resistance headquarters. At headquarters, after talking with Efra and Jaal, the latter can eventually be taken into your crew. Next, to continue the task “Ray of Hope” you will need to complete one of the two tasks assigned by the Angaras, namely to visit the planets Havarl and Voeld.
Having finished helping the scientists, we return to the “Storm” and talk with Efra De Tershaav, after which we go to the planet Voeld in the Nol system. Having arrived at the place quickly, before we freeze, we run in the indicated direction along the path illuminated by red lanterns (as in). Having met with the resistance commander, we go to secret object kett, where with the help of SAM we pass through the protective field. To break in, we find an access point, and having penetrated under the shield, we make our way into the complex through the ventilation, having previously shot the grate. Having destroyed the first detachment of enemies, we talk with the resistance fighters, after which, having decided to split up, we set off to Moshae. Having reached the room with the console, we use it to open the locked door, after which we pass along the corridors in the indicated direction.
As a result, having reached the room closed with a shield, we turn it off using the console, after which we scan the capsules and connect to another console standing in the center of the room. Moving further, we will come across a room where the hangars are turned into ketts, having killed all the enemies, we talk to Jaal and then begin to pursue the Cardinal. Having finally caught up with the enemy in order to defeat him, first of all we shoot at the drone establishing a protective field around the Cardinal. After the protective field is turned off, we try to inflict maximum damage on the enemy before he has installed new protection. Also, in a battle with the Cardinal, you should not get into the energy spheres that he shoots. Having defeated the enemy, we communicate with Moshae, in the conversation we will need to choose to destroy the kett complex or save the captured Angarians. After this, we get out onto the roof and fight off the kett while waiting for evacuation. Returning to Aya, we go with Moshae to the storage facility, after which we communicate with Efra and Moshae at the Resistance headquarters.
Help for Havarla scientists
After landing on the planet, we pass through a group of buildings called Daar Pelaav, there we will need to talk with Kiiran Dals, who will ask us to free the Angara scientists trapped in cryostasis. To complete this task, we go to the nearest monolith, killing all the robots along the way, and hack the relics console. To hack the console, you will need to scan two glyphs that you can find nearby on the monolith. The hack itself, like Eose, is carried out by arranging glyphs in a grid so that they do not repeat in rows, columns or selected forms. After you free the scientists, return with a report to Daar Pelaav to Kiiran Dals.

Cora Harper: Azari's Ark
Having received a letter from Cora Harper and talked with her, we go to Eos, where we will talk about the missing ark of Azari with Hydaria, located at the Prodromos outpost. Next, we go to the planet Voeld to track the Periphone signal there. Having arrived at the place and having driven an all-terrain vehicle to the indicated position, we begin to search for the ship; due to the large amount of ice and deposits of some minerals, we will have several signals, so we will have to drive through all the marked points. Having reached the desired place and cleared it of kett, we examine the wreckage of the ship in search of the Periphone transceiver, and after you find the device you will have to wait until Cora hacks the communicator.
Heart removal
After completing the “Meeting with the Family” task, we will receive this task, or rather the opportunity to infiltrate the kett base. Having gone to the indicated coordinates, we will find ourselves in a cave leading to the enemy base; by hacking the shield code through the console, we get inside, continuing to move through the cave and destroying enemies. Having climbed to the surface, we climb up the path to the buildings of the kett base. Having entered the premises of the base, we bypass the security system by turning off three Kett generators. After which you will need to destroy the kett security terminal, thus opening the way to the base core in the central tower. As a result, having hacked the next panel, we jump into the opened hatch and clear the next room from the kett. Continuing to move down the corridor we will find ourselves in the hangar, where we will need to destroy three landing platforms. Once on one of the platforms, we find out that the controls are blocked and to bypass the blocking you need to find and activate the terminal. SAM will find several additional terminals in the hangar, our task is to find the one we need while fighting off the Kett attacks. After you destroy all the terminals, all that remains is to eliminate the arriving Prefect and the remaining kett defenders, as well as get to the top of the tower in the Zenith observation room. As a result, having found ourselves in the right place, using the console, we neutralize the kett base and then create an outpost on Voeld in the marked place. And to complete the task “Removing the Heart” we return to Baksil.
Attack on the Kett base
To complete this small task, we scan the security matrix for vulnerabilities. After which we arrange sabotage and gain access to a safe storage facility from which we take out everything that is not nailed down (do not forget to inspect both the upper and lower rooms).
In the dark
After completing the task "Removing the Heart", the force field covering the excavation site will be turned off and we will be able to check the damaged signal. Having penetrated under the disconnected dome, we descend into the ice cave, where SAM will find a communication device nearby. Our task is to find a device that will be located on a corpse lying in a small dead end on the right side of the cave. After checking the data block, we return to senior intelligence officer Kaas.
Searching for the past
Having descended deeper into the ice cave, we destroy all the kett we meet along the way, after which we will need to free the captured hangars and talk with one of the liberated ones. Next, going to the partition, we scan it and then move away to a safe distance to blow up the wall. After the wall is destroyed, we go into the hall, where we will find a huge computer with ancient AI. After talking with the computer, you will need to decide to let this AI live or destroy it, thus saving one of the liberated hangars.
Missing scientists
We go to the specified coordinates and scan the found debris and bodies, you will also need to read the audio recording. Having finished at the crash site, we set off along the route planned by scientists and, having reached the indicated point, we will find the Architect of Relics. To defeat the Architect, wait until he falls to the ground, then, taking up defense in one of the buildings nearby, we shoot at the enemy’s legs and in his mouth (depending on what is indicated as the target). Also, in the battle with the Architect of Relics, you will periodically need to change your position, moving to other buildings and shooting small Relics. As a result, having damaged three limbs and shot the mouth of a giant robot (destroying the contours of the head and legs), we approach the defeated enemy and connect to him, after which we talk with Priya Blake.
Restoring the World
To complete this task, we will need to activate three monoliths located on this planet. Having driven to the indicated place, we scan three glyphs, after which we approach the relic console and activate the monolith by placing the missing glyphs, which should not be repeated in rows of columns and selected forms, as shown in the screenshots. Next, we repeat the procedure on two more monoliths, having previously scanned three glyphs on each. After successfully activating the three monoliths, we go to the entrance to the vaults, where we go down the gravity well. Having gone downstairs, we turn on the emergency generator, to do this we activate the console and then remove the lock from the storage, moving from one thermal generator to another so as not to freeze. Having killed all the relics along the way and eventually reached the desired place, we activate the next console, after which we leave the purification zone and exit the storage facility, thus improving the living conditions on another planet.


To be continued...
Job type: Additional tasks
Required conditions: go to Eos
Starting location: Eos
How to get a: scan any nameless colonist corpse
Find the bodies of the colonists and conduct a scan
Eos
In the harsh lands of Eos, the bodies of seven dead colonists were left to rot. Find them and scan them, then return to the Nexus to report the misfortune to their family and friends.
Subject 1: Hope: Theo J. Harwell
Body of Theo J. Harwell (1) lies on the ground next to energy storage device(which can be scanned for scientific data). Scanning the first body starts the quest.

Relic Monolith: Tegan C. Avante
This body (2) lies on the ground in front of a large boulder next to the first Remnant monolith. This is also where you will meet Peebee for the first time.

Item 2: Fortitude: Gordanus Trenitus
Find the turian's body (3) , lying between two kinetic barriers.

Subject 2: Fortitude: Porter M. West
Find the body of Porter M. West (4) , lying on the sand in the ravine northeast of Object 2: Fortitude.

Object 2: Fortitude: Thysa Ylar
Find and scan the body of Tisa Aylar (5) on Object 2: Fortitude.

Monolith of Relics: Amira S. Pavlov
Body (6) Pavlova's Amirs can be found at the southern Relics monolith.

Kett Research Facility: Daron T. Anton
Daron's body is found at a kett outpost. (7) , where you first meet Drac.

Players will now find themselves far beyond the Milky Way, into the very depths of the Andromeda galaxy. The main character (or heroine) will have to take on the role of the Pathfinder and thereby lead the search for a new home not only for humanity, but also for many other races in a new, hostile corner of space. Discover new and hitherto completely unknown secrets of the endless galaxy, eliminate alien threats, create your own powerful and combat-ready team, plunging headlong into a deep system of development and customization of skills (abilities).
The Andromeda Galaxy is a completely new chapter in the history of mankind, so only your choice will determine whether the new founders will be able to survive in it and find themselves new house. As you delve into the mysteries and secrets of Andromeda, with the future of many species resting on your shoulders, ask yourself... What are you willing to do to survive?
Walkthrough of the mission: “Get comfortable on the Nexus” ✔
“The Nexus is full of different organizations and departments. To fully understand what is happening, talk to the leaders and key employees of the base.”
This first additional task can be obtained during the passage storyline at the very beginning of the game. After the shocking news, the main character (or heroine) is asked to look around and get to know everyone, so the main four tasks appear: first - «» , second - «» , third - «» , fourth - «» .
First of all, talk to Addison, because she will be closest - on the captain's bridge a little higher. You can discuss many things with her, so the dialogue will turn out to be interesting. At the very end, I recommend talking to Director Tann, since after the conversation with him the storyline of Mass Effect: Andromeda will continue. Kandros can be found by going down a little further (he will stand on the right side in a small, peculiar compartment). Professor Gerik on the task «» can be found at the very end of the same hall in which you spoke with Tyrant Kandros. As for Cash, he can be found on the opposite side of Director Tann’s premises - on the other side. After this, you can actually go to Director Tann, talk to him, finish completing the first additional task and continue the storyline.
Walkthrough of the mission: “Sabotage at the station” ✔
“Technician Raj Patil believes that someone is deliberately damaging Nexus systems. You are asked to inspect the places where problems have arisen.”
After talking with Director Tann on the Nexus, immediately near the exit you will notice a person rummaging through some details of the panel. Soon he will have a small explosion, so you can approach and talk to him. As a result, after a short dialogue, he will ask the main character (or heroine) for help in solving technical problems on the Nexus, so if you agree, then you will receive this task. In any case, several main tasks will appear, each of which is related to the investigation and inspection of the station: the first - «» , second - «» , third - «» . Return to the pioneer headquarters (it's closest). The damaged panel in this area can be found behind a small potted tree. Use the scanner to examine it.
♦ : “The explosion at the node occurred as a result of the system’s attempt to compensate for a large energy surge. If we can trace the origin of the spike, we will be able to determine who had access to control the system.
Now be careful and do not turn off the scanner, because thanks to it it will be possible to trace the next crime scene using some analogue of the wiring (yellow line). IN certain moment You'll notice that the line breaks at the top, so go up the steps and scan the next area.
♦ : “This relay is designed to collect a small amount of excess charge whenever energy is distributed to other systems. If it were not found, it would eventually lead to overload and severe discharge. It could only be installed by someone with physical access to the console.”
At this point, the finds end, so go to the next place, or rather to the militia barracks, and look up there for the next place with a breakdown - this is, as usual, a square, inside of which there are a bunch of all sorts of technical gizmos, and around there are black spots indicating explosions and short circuits.
♦ : “The damage at the site was caused by direct blocking of safety devices. There are many names on the list of employees. I (SAM) will collate all the other data.”
The next cell is hidden because it is locked and is located behind the crates, right on the corner. It may not be possible to immediately determine the correct location by eye, but if you turn on your scanner, then you will immediately find the broken panel.
♦ : “Someone interfered with the operation of the system so that a discharge pulse was randomly created that would erase the system’s memory. The sabotage was carried out remotely. If we can trace the source, we may be able to determine who had access to this site."
After this find, the next yellow stripe will appear, which you need to follow to the next panel, so climb the stairs nearby and turn to the right, where the next panel is located right next to the boxes. The scanner will most likely not scan the cell right away, so wait a little. After scanning, Raj Patil will contact the hero via radio, who will tell you that Zara Kellus worked with these panels. This is how the task appears: «» .
♦ : “There was complete sabotage here. Only a few technicians had permission to enter here.”
So, to find the desired character you need to get to the living deck, and to do this you need to go down, go through the doors between the stairs, get further to the monorails and press the button to go to another location.
Upon arrival, go forward, go down the steps, turn right and stomp to the Atrium, where you will find a saboteur. After the dialogue, it turns out that Zara Kellus is just an ordinary technician who noticed strange problems in the panels, so a version has emerged that a third party is involved in this whole matter. This is how the task appears: «» . Get to the Command Center (to do this, go back to the monorails).
Upon arrival, review all security records. There will be three entries in total, and only in the third will you find a clue. Immediately after this, two main tasks will appear: the first - «» , second - «» . For show, scan all the employees nearby (although you can immediately go to the Hyperion), then head to the monorails to go to another location. During the sanitization process, sooner or later you will come across Dale Atkins, who matches all parameters, so you will need to talk to him. At the end of the dialogue you will have to decide what to do with it, but in any case the task will be completed.
Walkthrough of the mission: “First Strike” ✔
“Militia strike forces are conducting risky operations throughout the cluster. Talk to Kandros and see if he needs your help."
During the conversation with Tyrant Kandros, you will learn about the strike groups, and next to him there will be a control panel with a picture of the planet, so click on this panel and you will receive the current task, the first task of which will be: «» .
It would be easier, of course, to immediately go up and talk to him while on the Nexus. After the conversation a task will appear: «» . You don't have to go far, because the required panel is nearby. The APEX Strike Force control panel itself will not be difficult, so when you select the appropriate task to complete, the current task will be completed.
♦ : “To support the initiatives of the Initiative, you can hear shock troops on missions. If successful, they receive experience points, and Rider receives rewards. If you fail, there will be little experience, and there will be no reward at all.”
♦: « Strike Force, performing the most important tasks in the sector. Select and press the "Space" key to send the APEX there. The game will save before starting online play, and you will take on the role of one of the APEX operatives as part of a small group. APEX missions can be completed in network game team up with friends or through matchmaking to earn rewards and bonuses for your Pathfinder.”
Walkthrough of the mission: “The First Killer” ✔
“Nilken, an Initiative employee, was accused of murder, but it is not certain that he is actually guilty. We need to check everything to establish the truth.”
The passage of this task begins on the Nexus, after a conversation with the turian woman. The first task in this case: «» . The guard will allow you to talk to the prisoner without any problems. Moreover, Renzus (who is also a prisoner) will tell you that the murder on the mission was unintentional and since the “Pioneer” is an unbiased person, he asks to conduct an investigation, so this is how the task appears: «» . So go back to the Turian Commander at Militia Headquarters for a chat.
After the conversation, two tasks will appear: the first - «» , second additional - «» . Since the audio recording is nearby, you can listen to it on the control panel. But in any case, you will have to go to the witness. Go to the Colonization Department and go to the very top. After talking with the girl, go to Director Tann (he is located in the Pioneer Headquarters) to now talk to him.

Director Tann will be open to suggestions, so he will kindly provide the Pathfinder with coordinates to the crime scene where the body can be examined, but he only asks that nothing be told to anyone, since it is not yet clear whether he is truly innocent. In any case, you will have to go to the planet where, according to Renzus, the kett were spotted.
As you already understand, the path now lies on the planet Eos, where you urgently need to inspect the crime scene. Upon arrival, simply follow the marker on the map. When you find yourself on the spot, scan what is left of the dead man. After you finish, SAM will report that in fact Nilken did not commit a crime, but he wanted to, he was simply ahead of him. So now, with the information received, you can return to Director Tann to make a key decision.

Option one - Release Nilken
If you decide to release Nilken after all, then he will receive community service as a punishment, as a participant in this disorder, but will remain on the Nexus. When you talk to Marietta, she will express her deep gratitude to you. In addition, when you warn Nilken to watch his behavior in the future, Marietta will ask him what “Pathfinder” meant, but he will avoid answering and at this point your paths will diverge.
Option two - Banish Nilken
In this case, Nilken will be expelled, that is, he will be kicked out of the Nexus. Moreover, after talking with Kandras, he will say what you did right choice. However, this is not the end, because the next meeting with Nilken will take place on the planet Kadar, in the Govorkam star system, where he will try to establish life in exile. But that's all.
Walkthrough of the mission: “Monkeys in Space”
Walkthrough of the mission: “Fire Brigade” ✔
"Dr. Aridana asked to add some complex formulas to the SAM module."
"Fire brigade" - side quest in, in which this time you will have to deal with the cult of people who despise the very existence of artificial intelligence. In this walkthrough you will learn how to complete the Fire Brigade mission in the game.
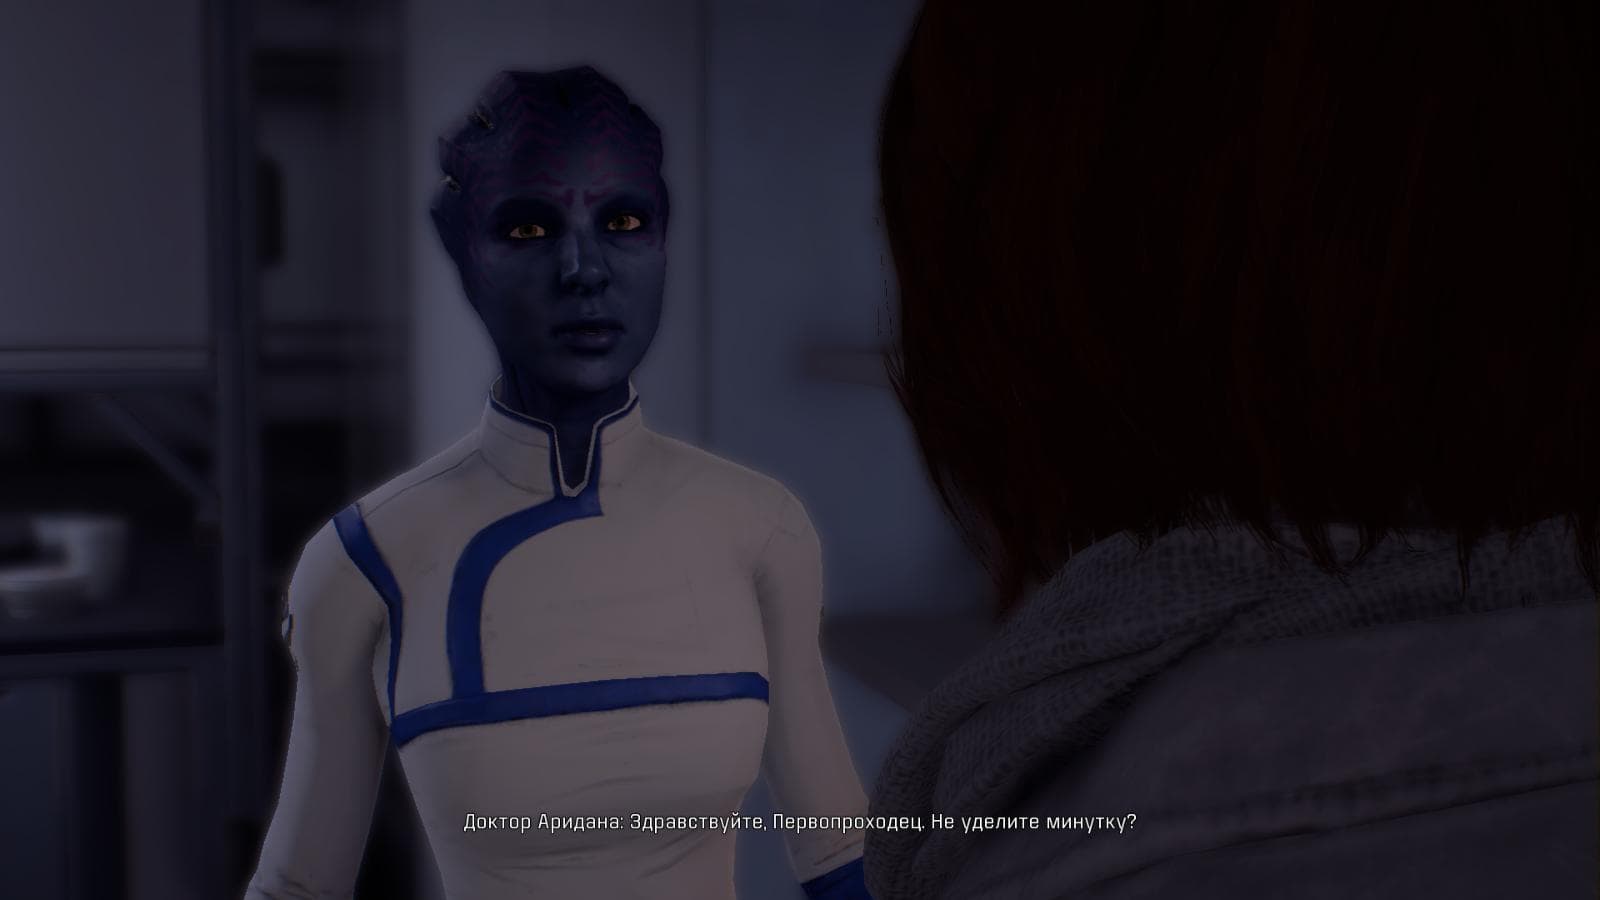
“Doctor Ariadana, upon arrival, will ask her to do a favor.”
How to complete the "Fire Brigade" task?
In order to take on this task, the first thing you will have to do is check Ryder's mail in his personal cabin. The message received will say that Doctor Aridana is asking for the help of the Pathfinder on the Nexus. The girl needs SAM to solve certain equations. After you go to the core and after SAM solves the equations, it turns out that in these problems there was a special virus that could disconnect SAM from Ryder, but this did not happen. The doctor will be out of business, but on the Living Deck Ryder will meet Avina (AI assistant), who turns out to have been hacked by hackers. Moreover, the hackers will think that their idea ended in success and therefore SAM will offer to play along with them, which, in fact, will need to be done. As a result, the hackers will promise to connect the hero with the leader of their group, whose name is Knight. But the meeting will take place only if you be sure to select the option “Can I meet her?” in the dialogue. In general, after this conversation you will have to wait for the letter to arrive in the mail.

"AI-Avina will be hacked by hackers."
As a result, the message will only come when you visit Kadar, because the lair of the new “friends” will be located on this planet. During the conversation you will find out why she hates so much artificial intelligence. And thanks to this, it will become clear that the girl is up to something dangerous, so you will have to find out where exactly Knight is going to strike his next blow. There will be two options for solving the problem: option one - you can calmly kill absolutely everyone in the lair, because any scanning you do will still lead to this; the second option is that it will be possible to make implants for Knight’s son (Alena), which will help him recover from a serious illness, after which he will give a word to search in the system.

“Implants for Knight’s son can be made on Bura.”
And once you have the information, you can safely return back to the Nexus to neutralize the three devices. Once you do this, you can talk to Knight again. However, now you have to decide: kill Knight or arrest (although there is a possibility that the possibility of arrest only appears if you have cured Alen).
However, there is another option. If you cure Knight's son with an implant, but still run a scan and then kill the entire team of hackers, then there will be another dark ending. It will not be possible to arrest Knight, so she will be shot. Immediately after this, a letter from Alain (son) will arrive in the mail, where he swears that he will avenge the death of his mother.

"Location of the first device."

"Location of the second device."

"Location of the third device."
Walkthrough of the mission: “Stones for Science”
"Use the scanner on unexplored worlds to test Lucan's new VI for geophysical exploration."
The task can be taken near Professor Gerik from a character named Chief Lucan. The first task will be: «» .
Walkthrough of the mission: “Missing Scientists” ✔
“Doctor Aridana sent a group to study the Fel, but the group has not been in contact for a long time. There is reason to fear the worst. You are asked to find out what happened to the scientists."
The task is taken on the Nexus from Dr. Aridana. The first task will be: «» . In fact, finding the ship will not be so difficult: when you have the opportunity to fly into outer space, go to a system called Ericsson, where you will carefully study the Blight. When the radar against the Blight lights up green, then an anomaly will be found, which will be the wreckage of a ship, and the very one that needed to be found.
♦ : “The ship received serious damage due to the Fel, which destroyed all internal systems. Doctor Aridana's team died instantly. The ship is drifting and cannot be used due to radiation contamination. The name of the shuttle is “Eudoxus”. The number of crew is 7.”
Walkthrough of the mission: “The Lost Arks”
"Tann has asked you to look for clues that could lead to the missing arks."
The task is taken on the Nexus from Director Tann. Thus, three main tasks appear: first - «» , second - «» , third - «» .
Walkthrough of the mission: “Secrets of the Ryder family”
“Your father blocked part of SAM’s memory and he cannot access some data. To gain access, look for memory activators while exploring planets."
During the passage story mission «» , after a private conversation with SAM, this task appears, the first task of which will be: «» .
Where can I find the first memory activator?
First of all, I recommend going to the cabin of the Riders' late father, which is located on the left side of SAM's Module. In the cabin you can find the first memory activator (such a round glowing circle in the center). Click on it and talk to SAM about the unlocked memories. SAM will tell you that his program has certain conditions that must be met to unlock the memory, so go back to SAM's Module to listen to important information.
Walkthrough of the mission: “Hero’s Path”
"Asari journalist, Keri T'Vessa, wants to interview you for a documentary about current events."
The task is taken on the "Storm", and the first task will be: «» .
Walkthrough of the mission: “Ghost of Hope”
Walkthrough of the mission: “Data Traces”
Walkthrough of the mission: “Models of spheres”
Walkthrough of mission: “Shock Therapy”
Walkthrough of mission: “Wonderful Life”
Walkthrough of the mission: "Early Awakening"
Walkthrough of the mission: “Movie Night: The Beginning”
Walkthrough of the mission: “Search for the Past”
Walkthrough of mission: “Trade benefits” ✔
Trade Perks is another side quest in Mass Effect: Andromeda. So, when you find yourself on a planet called “Aya”, a merchant named Sohkaa Esof, who can be found in the port (not far from the “Storm”), will ask the hero (or heroine) to deliver him an important cargo. In return, the merchant promises not only to enter into trade relations with the character, but also to put in a good word with the leader of the Resistance. IN this walkthrough You'll learn how to complete the Trade Perks quest in Mass Effect: Andromeda.

Take the task from Sohka Esof, fly to the planet Voeld and follow the mark on the map.
Go to the planet indicated above, find the merchant and take the task from him. Sohkaa will ask you to deliver him boxes of goods that are located on a snowy planet called Voeld. Gather your team and go to the marked place.

Scan the boxes and return to the merchant back on Aya.
Having arrived at the indicated location, go to the active marker, which is located in the southeast. Move until you come across a broken patrol, near which there will be supplies. At the same place, using a scanner, you inspect all the objects, during which you fall into an ambush, the initiators of which will be the kett. There won't be anything difficult, so just fight back and head back to the supply boxes. You scan them, pick them up and return back to Aya to return the cargo to Sohka Esof. As soon as you transfer the cargo to him, you will be able to trade.
Walkthrough of mission: “Restoring the world” ✔

“Relic technology is the key to restoring Voeld and turning it into the “golden” world that it should be. But first we need to find the vault by activating all the Remnant monoliths.”
Restoring the world is an optional mission on the planet Voeld. As on the planet Eos, you will need to activate three Relics (or more simply put, monoliths) to improve the atmosphere for building a colony. The main problems during the passage arise with puzzles that are sudoku. In this guide, you will learn how to complete the "Restore the World" mission in Mass Effect: Andromeda and how to decipher the codes of the Remnants (monoliths).
The character will receive the task automatically when he arrives on the planet Voeld, having driven around the surrounding area. Below are screenshots that show the location of all the Relics on the planet Voeld and their solution.
The first Relic on the planet Voeld
Go to the places that are marked in the order indicated. Upon arrival at the indicated location, find the missing glyphs that are necessary to decipher the relic code. The screenshot below shows the correct solution to the Relict code.

Decoding the first code of the Relics on the planet Voeld.
Second Relic on the planet Voeld
The second Relic is located inside the cave, where you can also find the necessary glyphs, so turn on your scanner and look for important items for the task. After the search is successful, hack the Remnant console.

Decoding the second code of the Relics on the planet Voeld.
The Third Relic on the planet Voeld
The third monolith will be a little more difficult than the others. Firstly, this time you will have to fight with enemies. Secondly, after destroying the enemies, you will need to find the glyphs, two of which are on the surface, and not inside the specified cave. If you do everything correctly, then the location of the vault will be revealed to the character, from which the lock must now be removed.

Decoding the third code of the Relics on the planet Voeld.
Vault on planet Voeld
Once in the vault, there are two very important things to do: the first is to activate the emergency generator, the second is to remove the lock from the vault. All these actions can be done using the relic console. After activating the emergency generator, the hero (or heroine) will be taken to the next location, which will contain platform elements from the previous planet. If there is no desire to bother with access to all sorts of random additional rooms with quite good things, activate the console to the right and go remove the lock from the vault.

In the vault on the planet Voeld you can find an additional room with good things. On the left side of the Vault unlock console.
Halfway up the path you will have to go upstairs - there is an additional room. Inside you will need to destroy a couple of powerful opponents. Next, go to the console and hack it, after deciphering the Relic code. In addition, after completing the decryption, your character will be able to receive two additional skill points.

Decoding the Relic code in the Vault on the planet Voeld.
Everything worked out? Then you need to continue forward to unlock the vault. Activate the console, then quickly move away from the black smoke to stay alive and, ultimately, seal the vault.
Walkthrough of the mission: “Removing the heart”
Walkthrough of mission: "Frequency" ✔

“A scientist from Voeld is complaining about some interference interfering with the operation of the equipment.”
Frequency is one of the planetary missions in Mass Effect: Andromeda. You can receive the task in one of the camps of the Angara rebel base. There is a researcher inside the building who will ask for help. The crux of the matter is that you need to explore unknown signal, so the character receives the main task and the first task: «» . In this guide you will learn how to complete the mission “Frequency” on the planet Voeld in Mass Effect: Andromeda.

Talk to the scientist and get important coordinates.
In this mission you will need to deal with a strange and unknown signal source that is causing certain problems for local rebel scientists. After talking with the researcher, he will mark a key place on the map, so the task will appear: «» . As soon as he does this, you can safely go to the marked point in the east. In addition, along the way you can stumble upon several Kett outposts, so if you want, then you can clear them out.

Scan the fallen meteorite and follow further instructions.
When you arrive at the indicated location, the hero (or heroine) will notice a huge piece of a stuck meteorite, so analyze and scan it at the same time. However, be on your guard, because soon your team will be attacked by a pack of Wild Ahdi, from which you can get a couple of Visible Plates. But still, after you kill all the enemies, all that remains is to neutralize the signal and the task will be completed.
Walkthrough of the mission: “Medicine caches” ✔

"A Resistance doctor on Voeld needs medical supplies to save the lives of wounded soldiers and civilians suffering from the planet's harsh conditions."
Medicine caches are one of the optional quests in Mass Effect: Andromeda. You can receive the task at the Angara resistance base, on a snowy planet called Voel. The main character (or heroine) will be asked to find three boxes of medicine in the form of supplies. The most problematic of these boxes is the third one, because, as it turns out, it is not so easy to get to. In this guide you will learn how and where to get caches with medicines on the planet Voeld in the game Mass Effect: Andromeda.

Talk to Dr. Kharin to get the coordinates for the location of the medications.
So, the doctor who will issue the task can be found inside the Resistance base. After the conversation, the doctor will mark the location of the boxes with medicines on the map, so you can safely go on a search.

All medications are marked in this screenshot and I recommend looking for them in the order listed.
The first two boxes of medicine are quite easy to find. In addition, one of them will be unguarded, but there will be an ambush by the kett, which you can safely ignore and go straight after the second box. The second one will be a little more difficult, since you will stumble upon a small kett base with several enemies inside, so you can only get another box of medicine after killing the kett.

Once you reach the capsule drop zone, drive up the slope and find a cave.
As for the third cache, it can cause certain difficulties because it is located on the top of the mountain. To avoid getting confused, use the map to navigate and follow. First of all, get to the capsule, and then go higher up the slope. Eventually you will reach the cave, but to enter you will first need to deal with the kett (they will ambush your team). So fight off the enemies, take the last box of medicine and return back to Dr. Kharin to complete the task.

The second cache can be found inside the cave after you kill a couple of aggressive kett.
Walkthrough of mission: “Sleeping Dragons” ✔

“A group of protesters are demanding that their families be brought out of cryostasis. We need to talk to Nexus management about how best to resolve this situation.”
Sleeping Dragons is a Nexus side quest in ME: Andromeda. So, the protesters on the Nexus are unhappy with the fact that their family members have not yet been awakened from stasis after the colonization of the planet Eos. In this guide, you'll learn how to complete the Sleeping Dragons side mission in Mass Effect Andromeda, and you'll learn what to do with the protesting villagers.
Protesting residents can be found in the general area of the Nexus, after the construction of an outpost on the planet Eos. They are located in the hydroponics zone. Upon arrival, talk to them, after which they will convey all their complaints to the main character (or heroine). It turns out that all the protesters will be unhappy with your choice on Eos, no matter what it was (military or scientific). The family members of these rebels were next on the list to be unfrozen, but the character selection on Eos dropped them lower on the list. So they will send you to talk to Kandros.
And if you don't talk to them, then it will look like you ignored the protesters' complaints, so they will end up in jail. In general, I recommend talking to him. After the conversation, he will arrange a meeting with Director Tan, Cash and Addison. During the conversation with them, arguments will appear that are aimed at nipping the rebellion in the bud. They will argue that the Initiative is unable to support any additional colonists at this stage, and therefore believe that this issue should only be handled with a firm hand.
Therefore, by the end of the conversation, the “Pioneer” will have to choose exactly how to deal with the protesting residents. There are two options for solving the problem, which pass without any serious consequences, and they also will not affect the main plot story in any way. Two options for solving the problem: 1 - “Stop the protest” (Kandros will arrest all protesters), 2 - “The protesters are right” (“Pioneer” will personally unfreeze all relatives).
Walkthrough of mission: “Nexus: Infection” ✔
“The initiative brought a citizen suffering from an incurable infection out of cryostasis. Track down the patient and return her to the capsule before she spreads the infection.”
"Infection" is an additional task in. The plot and events of this quest will revolve around the search for one local resident of the Nexus, who turns out to have disappeared. The task, in turn, is quite long and has a difficult choice at the very end. So this walkthrough guide will help you complete the task, so you will find out what exactly will happen if you kill or spare the leader of Roekaar.
Useful information: The “Infection” quest can only be taken after you open Kadara, but you won’t be able to complete the quest until you have access to the Kadara slums (which means that you will need to complete the main mission of the storyline under title "Hunt for the Archon").
How to complete the mission "Infection" inMass Effect: Andromeda?
So, after Kadar is opened, upon returning to the Nexus, Ryder will receive a message from Captain Dunn. You can talk to her on Hyperion. The girl will tell you that a sick woman has disappeared, so she will ask you to talk in more detail about the incident and problems with Dr. Carlisle in the infirmary on the same ship.
After the doctor, you will need to talk with the officer who is responsible for immigration in the general area. The next step in this task is to scan the general area. The purpose of the scan is to look for traces of Ruth Becker's actions. The trail should lead you to a bar called the Vortex. Follow the trail inside, where you will then need to scan the hologram near the table.

"Use the scanner to follow in the footsteps of Ruth Becker."
There will be a salarian named Lator standing at the bar - talk to him. During the conversation, he will send the hero to the command center, where, in turn, he will need to talk with Theron. The next stop after the conversation with Theron is once again the docks. In this place, find and talk to the wounded pilot. It turns out that Ruth Becker stole his ship, so he will have to go in pursuit on the Tempest.

“It is necessary to scan the anomalies to find out exactly where the girl sent her next.”
As soon as you find yourself in space, the game itself will tell you which system needs to be scanned. Beacons will need to be launched into the indicated location, as usual, and as soon as the first trace (anomaly) of Ruth Becker is found, it will be possible to move on to the next indicated system. Soon, therefore, you will find yourself on Kadaru, where the girl is now arriving.
In the northwestern part of the map on Kadaru, the first thing you will need to do is find Ruth’s shuttle. Then you will need to follow the path straight to the shelter called “Roekaar”. Along the way, you will definitely encounter bandits, so after you kill them, enter the lower floor of the base. Use the terminal to open the doors upstairs. As soon as the hero enters the room on the top floor, he will find Ruth Becker standing at gunpoint with the local leader of the shelter, Roekaar.

“The choice is yours: save Ruth Becker and thereby release the bandit from the virus, or kill the bandit and Ruth, thereby eliminating the possibility of spreading the virus.”
Option one - “Kill the Roekaar Leader”
The only problem is that Ruth Becker is a carrier of the infection. Leader Roekaar, in turn, plans to take a sample of the virus and use it as a new biological weapon. If you decide to kill him, then he will kill Ruth and there is no way to stop this. However, in this case the infection will be stopped, so not everything is so bad. In the end, Ruth Becker's body will have to be transferred to the Nexus in a cryo-chamber.
Option two - "Allow the Roekaar leader to escape"
If you give the bandit leader the opportunity to escape, he will escape with a degraded and even possibly unsuitable virus for the sample. Besides being a risk, it could also save Ruth Becker's life. After this incident, Ruth will have to be frozen and sent back to the Nexus with her.
Walkthrough of the mission: “Betrayal of the Krogans” ✔
“William Spender is an undeniably complex man. But there is reason to believe that the Assistant Director for Colonial Affairs is actively digging under the krogan. Drac asks you to check this."
"Betrayal of the Krogan" is the first task that is designed to increase Drak's loyalty in the game. Addison's assistant (named William Spender) turned out to be dishonest and is doing everything to interfere with the krogans, thereby compromising their work on the Nexus. You, in turn, will have to bring this person to clean water. In this part of the guide you will learn how to complete the mission “Betrayal of the Krogan” in Mass Effect: Andromeda.
Completing the quest “Betrayal of the Krogans”

“Comrade Kandros will provide access to security records after the dialogue.”
Head to the Nexus to talk with Kandros, Cash, and, in fact, Spender himself. So, it turns out that Cash thinks that Spender is hiding something, so he asks Kandros to find out if there is evidence of Spender’s crimes on the recordings from the security cameras. Having gained access to the security cameras, you will find out that there is a recording, but it is the only one and is of poor quality, so SAM will come into play, who will determine the coordinates of Kadara, so he will go there. Upon arrival at Kadar, go down to the local slums and then on the “Nomad” drive straight along Spender’s trail. There will be a mined field right in front of the lair, so you will have to get up from the all-terrain vehicle and walk further on your own two feet with a scanner in your hands.

“You need to get to that distant building, but you won’t be able to get there because the field around it is mined, so go there on foot, using the scanner along the way.”
After all resistance is suppressed, it turns out that Spender is selling stolen goods on the Nexus to some exiles, and is also working with a certain person named Aoran. So it's time to go back to the Nexus and visit Spender's apartment to take the encoder (it's hidden behind the monitor on the wall). And after the device is found, hand it over to the technician and finally speak with Drak, who will issue the next task, and the current one will be completed.

“The encoder can be found just behind the monitor.”
Walkthrough of the mission: “The future of the people” ✔
“The krogan have tracked the stolen transport to the mines outside Elaaden. The krogan colony could face starvation unless Pathfinder and Drak return the stolen seeds."
"The Future of the People" is the second task that concerns Drak's loyalty in the game. According to the plot, the transport of the krogan colony, which in turn was transporting a unique seed fund, was hijacked, so Drak asks Ryder to help find it. Essentially, this mission is a direct continuation of the quest "Betrayal of the Krogan", so in this walkthrough you will learn how to complete the quest "The Future of the People" in Mass Effect: Andromeda.
How to complete the task “The Future of the People”?

“Here, in fact, is Novaya Tuchanka.”
Having accepted the task, go to Elaaden, and on the planet get behind the wheel of the Nomad and get to a place called New Tuchanka. Upon arrival, talk to a krogan named Hark, under the guard of whom, in fact, the ship was hijacked. So, he will give you the coordinates of the local pirate lair, so you can go immediately to this place.

"Guard Hark will send the main character in search of a pirate's lair."
Upon arrival, a long battle will begin with the local guards, but when the battle is over, you will meet the same Aroan who appeared in the last task. So, after another shootout, Vorn (a laboratory assistant, without whom the fund is absolutely useless) will contact Ryder. Your hero will not be given a choice, because this time Drak will decide everything himself, but after rescuing Vorn, another shootout will follow. Then after the battle you will have to go for the cargo, where the battle will break out once again.
Overcoming enemies, the chase will end with Ryder and Drak meeting Aroan again. And now you have to decide what to do with this interesting person: kill him or leave him alive. If you decide to kill Aroan, then Drac will immediately throw him into the abyss, but if you leave him alive, you will be able to find out something from him about Spender. However, in any case, the task will be completed one way or another.

“It’s up to you to decide exactly what to do with Aroan: kill and enjoy revenge, or leave him alive and get valuable information.”
Walkthrough of the mission: “Woeld: The Lost Song” ✔
“The criminals are hunting the Yevara, native creatures revered by the Angara. Hunt down the poachers and earn the respect of the inhabitants of Voeld."
“The Lost Song” is an additional task that can be taken on the planet Voeld. According to biologists, the creatures called “Yevara” are a rather rare species, which, on top of that, have been attacked by local poachers. The main character will have to not only find the poachers, but also punish them. In this walkthrough you will learn how to complete the mission “The Lost Song” on the planet Voeld.

“The first thing you have to do is talk to biologists. After the dialogue, you will not only receive the task itself, but also find out where the poachers are now.”
How to complete the mission “The Lost Song”?
So, near the camp, which is located in the very center of Voeld, you can find biologists. After talking with them, it turns out that the sacred animal species of Yevar is at the stage of extinction and therefore needs effective protection from attacks by poachers. And since they are sacred to them, they ask for help. Therefore, as soon as you receive the task, go along the presented route to find the poachers. Upon arrival at the key location, scan and read the data block carefully. Based on the information received, you will find out exactly where the poachers’ camp is located.

“Find a block of data that will now help you find the location of the poacher’s den.”
When you find yourself in the camp, the first thing you will need to do is clear the area of kett and local mercenaries. Thus, clear the entrance to the cave. Making your way through the cave inside, you will again have to encounter several enemies along the way, but nothing difficult, so follow the marker ahead. At the very end of the cave, Ryder will come across the leader of a gang of poachers, Voeld, who will tell his version of what is happening around him. After listening to everything to the very end, you will have to make a rather difficult choice.

“At the very end of the cave you will meet the leader of the gang, but after a short conversation you will learn new details of the whole story, so you will have to make difficult choices.”
Dear visitors! Mass Effect: Andromeda side quests are currently under development, so bookmark this page to make it easier to keep track of updates!